Showing posts with label dollar store finds. Show all posts

Friday, May 24, 2013

Skylanders Party Planning - Part 6, Flame Arrows

The Skylanders party planning continues!  I made the flame arrows for the Flameslinger Fire Element game mentioned here.  These were super easy, super fast, and I think the kids will LOVE them.
First, I assembled my supplies - 12 Dollar Tree suction-cup arrows and packs of metallic cellophane shreds in gold and red.  Then it was time to fire up the glue gun.  For each arrow, I used 4 gold and 4 red shreds and draped them over my fingers.  I fiddled with the shreds to get it so that they were all different lengths and then pinched in the center and twisted a bit. 

I wedged an arrow between the edge of the counter and my fancy and not at all unsightly "glue gun tray" and dispensed a blob of hot glue onto the arrow near the suction cup. 

Working quickly, I applied the center of the twisted shreds to the glue and wrapped one side over and the other side on top and pulled them taut.  Once the glue sets you are done.

They are stored in a bundle with a plastic bag on top to keep them from getting dusty.  It took me about 10 minutes from start to finish.  Not too shabby!

Wednesday, May 15, 2013

Skylanders Party Planning - Part 5, Mod-Podge Woes, Faux Leather Treasure Chest, Neon Balls, and a Portal Punch Possibility

I'm chunking through my Skylanders Party to-do list - whoo hoo!  The party isn't until July, but we have big vacation out West planned for June, so I'm trying to be proactive.  Next up...

Treasure Chest
This chest was a thrift store find.  It was originally cream with grapevines and a bit of a crackle finish.  I just attacked it with some brown spray paint. 

I LOVE that the crackle finish is still visible but now looks like textured, pebbly leather.  I will pretend that I knew all along that this was how to make spray paint look like leather.  It will be our little secret.  Kay?
Next step is to rub the nail heads and clasp with some dull gold glaze.  Once done, this will hold the party favors and the kids will need to do a treasure hunt to find it.  I all ready wrote and printed the clues.  Sample clue:  Find your way to a very tall tree, around the trunk you'll find clue #3. 

I wrote all the clues in verse 
could anything be worse?
Than someone who thinks she's a poet
and doesn't really know it
that she's not?

For the Wrecking Ball Tongue Grab Magic Element Challenge, I found 2 large flat platters at the Dollar Tree.  I thought that these would work to hold the gems to be grabbed and the shallowness of the lip wouldn't interfere with the game.

To make them more fun, I mod-podged on pictures of Wrecking Ball with 2 different catchphrases. 
I'm having a lot of trouble with my mod-podge lately - lots of wrinkling.  I think that I need to switch to card stock instead of regular copy paper.  So be forewarned - these are not perfect.  I just have to accept this with a sigh and move on.

For Trigger Happy's Coin Toss Tech Element Challenge, I found some red and gold bins at Dollar Tree and hit them with some mod-podge as well.
Wrinkled again!  Doh!  The kids won't mind, right?

And finally, I modified and gussied up the Dollar Tree boomerangs originally shown here with some brown paint and mod-podge.  You can see one in the front here:

Meh.  Not my best work.  But I think that the kids will get a kick out of these more so than a plain old tray, bin, or boomerang.  Note that the boomerangs are meant to fly with a helicopter attached, but the kids tested them and they work just as well sans copter.

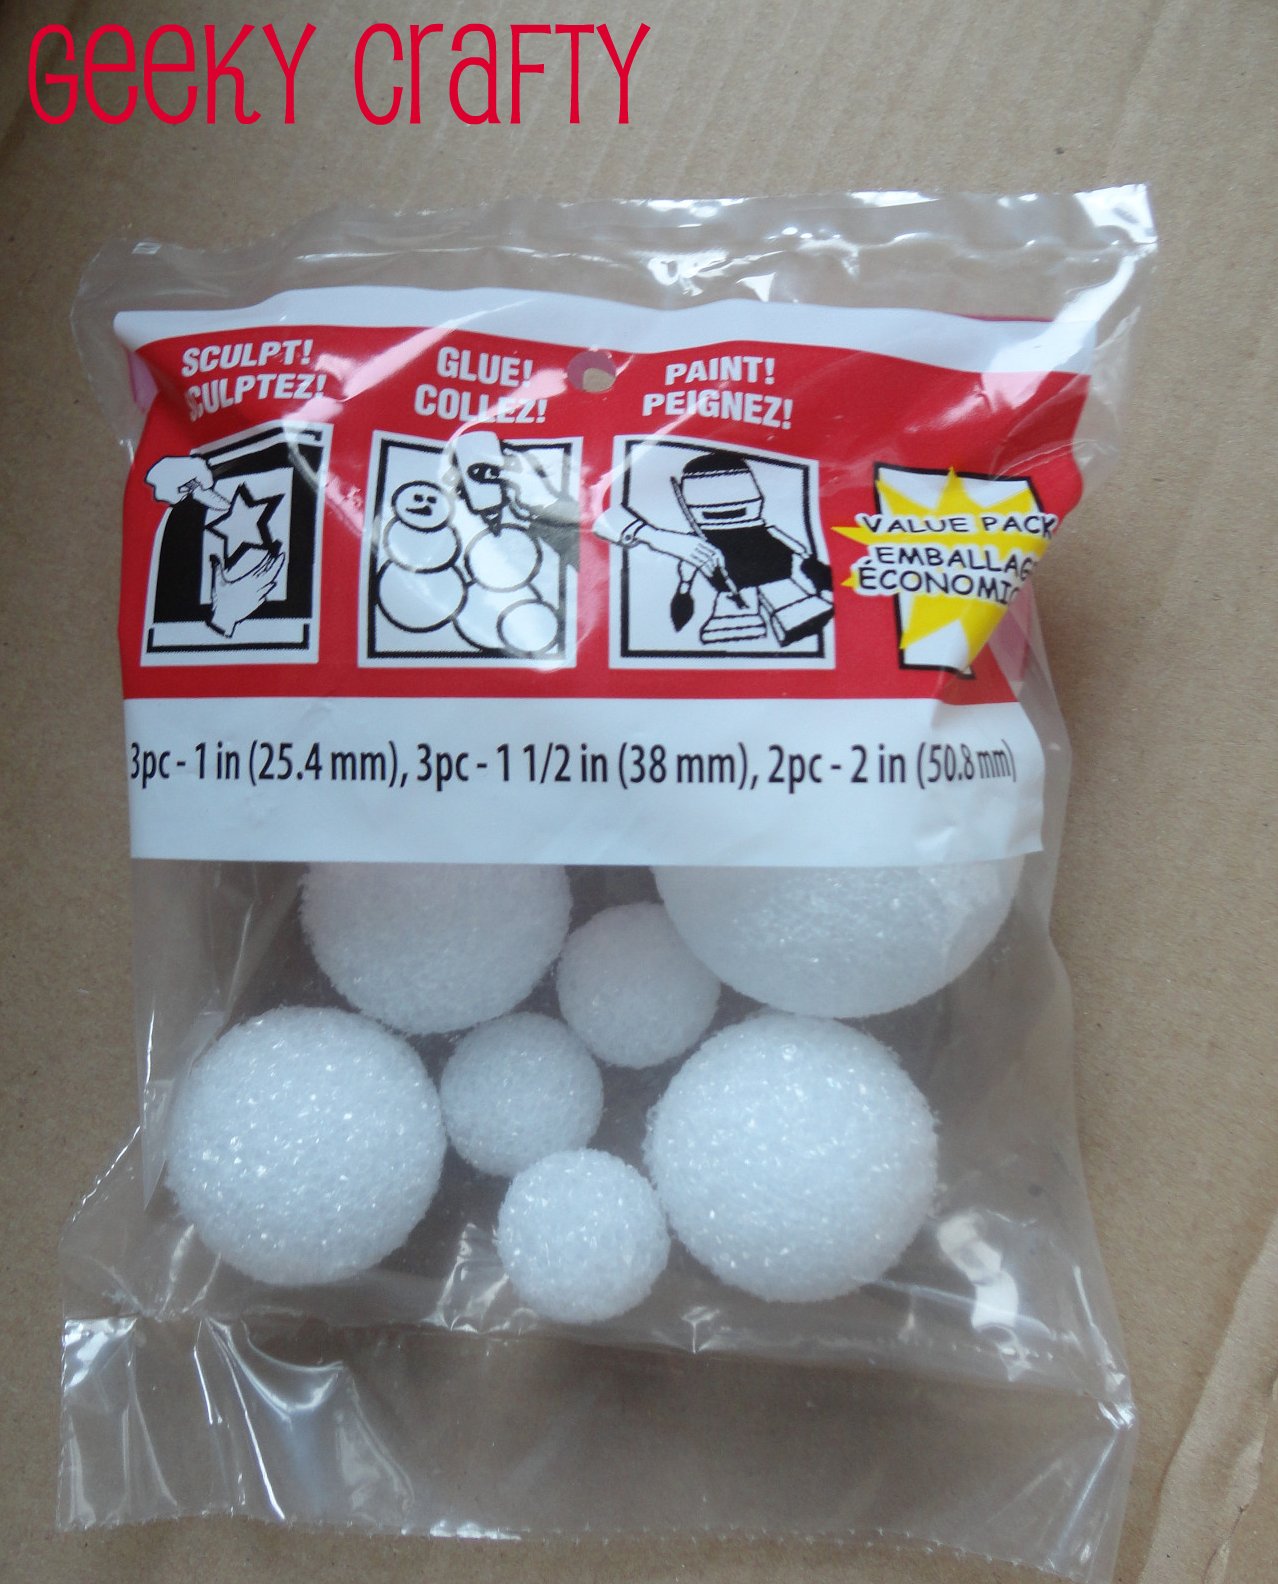
While I had the drop cloth out for the treasure chest, I also took some time to paint some foam balls found at Dollar Tree (again with the Dollar Tree!).  The idea is to use my frosted glass bottles and make funky centerpieces.  I used bright green, orange, aqua, and purple to turn these plain balls into...

...these bright balls.  Aren't they fun?

I might do this again and make a wreath - I love how colorful they are.

And finally, at a store you might have heard of called Dollar Tree, I found this little foam ring, which doesn't look like much, but will hopefully work for my vision of a Portal Punch. 

The color changing pumpkin light fits PERFECTLY in the middle and my punch bowl will be supported on top.  If this works, if will be fabulous!

Thursday, April 25, 2013

Making a tissue paper tassel garland

My daughter and a friend are having a joint birthday joint in June at a local rock climbing place.  I'm really looking forward to it overall, but in terms of decor was feeling a bit stymied about how to bring some personality and prettiness into that cavernous space.  Obviously, I can't decorate the whole building, so I decided to focus my efforts on a single table, which will be used for the cakes and favors.

The table will be in the party loft area, which is in the center of the space and is rimmed by a half wall with a top rail made of pipes.  My plan is to use zip ties to vertically mount 3ft. wooden dowels to the pipe rail.  I can then swag a garland from the dowels.  I decided to make tissue tassel garland because I have an overabundance of tissue paper and they looked pretty simple to make.  I am here to tell you that they ARE in fact very simple to make.  This may be the easiest and most impactful decor element I've ever made and they couldn't be cheaper.  I am a tissue tassel convert!

First step - assemble your tissue.  We have a party palette of blues and greens, so I pulled everything from kelly green to teal to powder blue and some white mixed in to boot.  (Disregard the red in there - I didn't use that.  I didn't use the prints either - too distracting.)
For this project, I pulled out my latest craft find - a large rotary cutting mat.  We have a second-hand craft store in town (I know - LUCKY!!!) and I got it for about $2.  Now that I've used it, I wish that I had bought one sooner.  It's so much less wear and tear on my hands and wrists, which are all ready in bad shape from all the computing and pipetting that I do at work (yes, I am a craft geek and an actual science geek as well - I'm an all-purpose geek, really...).  Now that you have your supplies, it's time to dive in.

Pull out a sheet of tissue and spread flat.  Cut it in half.  Go all the way up - I paused here to take the picture.


Take one half and fold in half.

Fold that half in half the other way.

Zip through with your rotary cutter, slicing up to about 1inch from the fold line at the top.

Make your cuts as thin or wide as you like.  They don't have to be perfectly even and it's OK if you get overzealous and slice some off.  You won't miss them in the final product.  Once you've fringed it up, open it flat and start rolling or pleating the un-fringed area.  I've done it both ways and neither is easier or prettier than the other, so your choice.

Do try to shake the fringes out every couple turns or it will get twisted up.  It's harder to untwist the fringes at the end, so be scrupulous about this now.

Once you've rolled/pleated the whole thing, start twisting the unfringed area tightly to compress into a thick ropey line.  Now twist the ropey line into a loop and twist the bottom of the loop closed.
You are now almost done.  All that remains is to seal the loop.  I've seen washi tape, glue, hot glue, string, and my personal choice - tiny hair elastics.  I found 2 kinds at the Dollar Tree - black and an assortment of blues and clears - perfect for my garland.  (I saw all clear ones at Walmart, but they were $3 for 75 - no thanks, Walmart.  I will take my business to the Dollar Tree.)  I'll be keeping my eyes open for a set of clear ones at the Dollar Tree - I'm sure it's just a matter of time... 

I like the elastic approach because it's quick and easy and cheap doesn't require that I sit near a power source for the glue gun or have to wait for drying time and also no burning my hands - yay!  This means that I can twist absentmindedly whilst watching Buffy the Vampie Slayer reruns (yes, I'm that kind of geek as well.  And incidentally - BtVS is probably the best show in the history of the world.  FYI.  I resisted at 1st because - really?  It's called Buffy teh Vampire Slayer?  No thanks.  But a good friend made me watch it and OMG - it's amazing.  Smart, funny, scary, sexy, romantic, devastating, heartbreaking, thought-provoking...  I could go on...  and on...  and on... sorry).  Anyhoo, reagarding the elastics, I could also theoretically reuse them when I trash the garland.  Just pull off and save the elastics for another time.

I'm not going to string the garland until the party is closer (will use either twine or this teal rope that I got from the second-hand craft store - $0.50 for the whole roll!), so for now I'm storing the tassels in bunches threaded on pipe cleaners.  The bunches are hanging on a hook in my basement. 

I did also cut a hole in a shopping bag and drape it over top to avoid dust and fading - tissue paper fades like crazy.

Monday, April 22, 2013

Skylanders Party Planning - Part 4, Mod-Podged Shields and Elixir Bottles

One advantage to having a late, freezing-cold spring like this one is that I haven't been distracted by nice weather and have instead been holed up in the craft room, diligently working on projects for upcoming parties.  Here are the latest projects for the Skylanders party... gussied up Dollar Tree Frisbees for the Undead element challeng and the 1st step to transform Orangina bottles into Healing Elixir bottle centerpieces.

Chop-Chop's Shields
As mentioned in this post, I bought some blue Frisbees with plans to turn them into "shields" for the Undead element challenge.  Chop-Chop has a shield that he flings at his enemies - at the party, the guests will fling the Frisbees at an as-yet-to-be-determined target and hopefully not at each other.  Anyhoo, I found an image of Chop-Chop that I modified in Photoshop Elements.  (I subtracted the background - that is all that I know how to do in Photoshop.  Pathetic, I know.)  I then pasted the image into PowerPoint, fiddled with the size a bit, and printed on cardstock.  Traced a circle with a cereal bowl, cut it out, and got out the mod-podge.  This is how it looked just after mod-podging.

This always happens with mod-podge and I always get panicky ("OMG - this looks terrible!  I've ruined it!"), which is silly, because it always ends up fine.  The Frisbees ended up looking like this...

Perfect and beautiful.  Thank you, mod-podge.  I am pleased.  I will work on my panic issues.

Elixir Bottle Transformation, Step 1
As mentioned here, I was originally going to fill the Orangina bottles with blue fluid and serve them as drinks.

This was before I served said Orangina at my egg hunt and nearly everyone took a bottle home with them.  I thought about starting over and buying more, but Orangina is kind of expensive and, let's be honest here, I really don't need those calories, soooo I modified my approach.  Instead of serving drinks, the 4 bottles that didn't walk will become centerpieces.  I plan to fill them with a funky arrangement of colorful balls on pipe cleaner stems (more on that later).  For the 1st step - turning the bottle blue - I found a cool idea on Pinterest to use diluted glue and food coloring "paint" to make glass look like sea glass.  Note, this treatment will not be waterproof!  It was, however, very easy.

Place 1 part glue and 1 part water in a small cup.  You don't need a lot.  Add liquid food coloring until desired shade is achieved.  Mix well with a paint brush that you won't mind throwing away.  Using the paint brush to paint on an even coat of the glue mixture.  It will look a little blotchy, but don't panic - it will dry to a nice even frosted look.

Love it!  Next step is to make a label that looks like an Ankh for each one.  Photoshop, here I come.  In about 10 hours, I should have figured out how to make a label.  Hopefully.  Probably not, though.  (Seriously, am I an idiot?  Is Photoshop hard for anyone else?)

Monday, April 8, 2013

Lego Storage

We are crazy for Legos at our house.  Both my daughter and my son love them.  My husband and I love that the kids love them, but what we do not love is stepping on Legos - that is no good.  We have several storage systems in place to combat this torture. 

For what I think of as "general" Legos - these are the ones that don't come with a specific set and are used for free play - we have some regular Rubbermaid/Sterlite tubs, a nifty sorting bin with removable compartments, and my personal favorite - the giant Lego head. 

My problem with these solutions, however, is that they don't allow for a way to keep kits and instructions together.  It drives me nuts to spend big bucks on Hagrid's Hut or a Ninjago Rattlecopter and then see the pieces scattered and the instructions lost.  Not to mention mopping up the tears because the kids want to recreate these structures and can't because some crucial, tiny piece is lost in the playroom.  My solution...

... small Dollar Tree snap-top bins.  These are sold in sets of 2 for $1.  I love the bright colors and the secure locking lids. 

They are sized just right for most of our Lego sets and you can fit the instructions right in there with the Legos.   They stack nicely (vertical storage!) and fit well on the shelves in our playroom.
For larger sets, I just look for larger containers.  8x10 Rubbermaid Take-Alongs are great for those and can also often be found at Dollar Tree.

Wednesday, March 27, 2013

Egg Hunt: Food

Our first neighborhood egg hunt was very successful despite the snow.  (Our apologies to the kid looking for the white eggs.  Oops.)  We got lots of compliments on the idea and how it brought everyone together to spend time with one another and chat.  I've always wanted to live in one of those neighborhoods where people hang out together all the time.  This isn't that neighborhood YET, but I've realized that I can help to make it happen if I want to.  Be the change you want to see in your neighborhood, one party at a time.  That's a direct quote from Gandhi, people.*

*OK, maybe I tweaked it a bit, but I think that Gandhi would have loved a good block party.

Anyhoo, here's what I made...  and please disregard the unsightly siding on my house.  Superstorm Sandy did a number on it and it's been too cold to repaint.  We are getting vinyl this summer, hopefully!

FOOD

This was so much fun and I was very proud of my little economies.  I tried to get variety by using some of the same ingredients in different ways.  For example...

... I used one box of cake mix to make both cupcakes and cake pops.  Cupcakes are topped with homemade buttercream (you can make a delicious ton with just 2 sticks of butter, some powdered sugar, and a splash of milk - it's super easy and you will get mad props from your peeps for making homemade frosting) and both cakes and pops use sprinkles from the dollar section at Target.  Link to printables is posted below.


... and I used a bag of Oreos to make both Oreo truffles and Oreo pops, also topped with $1 sprinkles.
I love them on the bed of Easter M&M's - so colorful and who doesn't love edible decor?  By the way, the glass tray was a thrift store find for $2.00.  It's actually a candle plate.  I bought it because it's very shallow and therefore wouldn't require a ton of filler. 
I used my old standby of marshmallows to fill things out a bit for a buck.

Plus I found a bag of cotton candy at the Dollar Tree and that filled a bowl nicely, also for a buck.  Incidentally, the candy jar here and the fishbowl holding the Bunny Tails are also thrift store finds.
I wanted some height and whimsy and more peeps, so I skewered some chicks on kebab sticks mounted in a styrofoam ball.  Iridescent Easter grass from the Dollar Tree was a great, cheap bucket filler.  I added height with a sturdy box covered in Dollar Tree wrapping paper and a sheet of scrapbooking paper.

I wanted to mix it up and have some things that weren't too sweet as well.  Baked Cheetos and Veggie Straws fit the bill and went over well.  I lined the basket and tin with waxed paper to 1) avoid grease stains on the cloth basket liner and 2) ensure that nothing harmful leached from the tin into the food since I wasn't absolutely certain if it was food-safe.

My most time-intensive treat was my parfaits in a jar.  I loved the spoons tied to the jar with the same yarn used for the pennants.  It was very practical because I didn't have to put out a separate container for utensils.  Check out this post for details on how I made this treat:  Parfaits in a Jar  They were a big hit.  I did notice that people were taking them home rather than eating them there, so if you make them yourself, be prepared to bid your jars adieu.  The cake pedestal that holds them was an after-Easter-sale purchase at Target a few years ago.
For drinks, a big jug of water and a tin bucket full of Orangina.  And a pretty jar of colorful straws.  I know that plastic straws are soooo passe, but I like the vibrancy of the colors here.  And I liked the price as well - $1 at Target.
I used a great set of free printables found on Catch My Party, designed by Autumn Leah Designs for the cupcake toppers and food signs:  Chick Printables

The "Keep Calm and Peep On" free printable was found here:  Peep On  It wasn't quite 8x10, so I trimmed it and mounted on cardstock to fill it out.  I popped the whole thing into a frame from Ollie's.  I use this frame for a rotating series of seasonal art.

Sunday, February 17, 2013

Skylanders Party Planning - Part 1, Dollar Store Finds and Paper Straws

So my youngest is turning 7 in a few months and has asked for a Skylanders theme for his party.  My reply - "Awesome!  What's a Skylander?"  You see, he doesn't actually HAVE the Skylanders game or anything.  Chalk it up to the magic of school friends with more video gaming privileges...  Anyway, I am not one to back down from a challenge, so I took to the internet to learn about the Skylanders and hopefully find some ideas that I could translate into a fun, affordable party without too much video game violence.

I was pleased to learn that Skylanders seems like a pretty cute and creative game - yes there is fighting and battle and stuff, but it's pretty mild.  The game boasts lots of bright colors and tons of characters and details to pick from and incorporate into a party.  On the inspiration front, while there are no Skylanders mass market party pieces yet, there are a few great blogs featuring real parties with really creative ideas.  I've used them for inspiration.  Please check them out - they are amazing:

Plucking Daisies
Great creative game ideas and tutorials
Wine and Glue
Clever ideas for a sweet table / candy buffet / candy party favors
Amy's Party Ideas
Beautiful design elements and creative use of printables

It's still early days for me, but I am deep in the planning process.  My kids and I worked together and came up with some great activities - some from the blogs above and some we made up ourselves, each one based on a different element.  Here's our plan...


ELEMENT CRYSTAL CHALLENGE
Collect crystals from each element by completing the challenges at each station.  We may make collection of crystals the key to "unlock" a treasure hunt.  The treasure would be the favor bags.  Still not sure about this. 

AIR
Jet-Vac’s Air Lift:  Keep the balloons in the air by blowing.  No hands.  

LIFE
Zook’s Bamboo Rocket Launch:   Launch foam rockets.  Try to surpass a minimum distance.  Since Zook likes to speak in Haiku, try to write the game sign blurb in Haiku.

MAGIC
Wrecking Ball’s Tongue Grabber:  Snag crystals with sticky hands. 

WATER
Slam Bam’s Ice Crystal Smash:  Freeze crystals in ice balloons.  Remove balloons before party.  Have guests smash ice orbs to release the crystals.

TECH
Trigger Happy’s Target Practice:  Toss coins into a gold bin.

UNDEAD  (Do they have to call it "Undead"?  Wouldn't "Ghost" or "Spirit" be better?)
Chop Chop's Shield Fling:  Try to toss shield (Frisbees) through a wall (crepe paper streamer curtain - will serve as a backdrop for the food table later.

FIRE
Flameslinger’s Fire Arrows:  Try to hit a suspended target (large round disc) with flame arrows.

EARTH
Dino-rang’s Boomerang Toss:  Try to get boomerang to come back to you
 

With these details in place, I have started buying supplies when I see them and let me tell you - I hit the jackpot at the Dollar Trees.  And I say "Trees" plural because I have gone to several different ones in my area and each one had something different / awesome / perfect for this party.  Details below...

Pink sticky hands to look like tongues!
Green rocket launchers to look like bamboo!
We can paint to rockets red to match Zook's!
Boomerangs!  May paint them brown to look more like Dino-Rang's...

Frisbees to use for a shield toss - will mod-podge on an image or Skylanders logo...
Coins to Trigger Happy's coin toss - will paint them shiny gold!
Archery sets for Flameslinger's Arrows - will affix red and gold cello shreds to make the arrow look like shooting flames!
Green balloons for the Chompie stomp - the exact approach is to be determined...  And white and blue balloons for the balloon blow!  These actually came from Five Below.
So as of right now, I have almost all of the supplies needed for 7 of our 8 games, and I've only spent about $40.  Score!

And lastly - this was found at Target - they are catching on to the paper straws and pennants party trends.  I love the color assortment here, although I will swap out the pink for lime green.
Stay tuned for more details as the party comes together!